Homework #2 - Figma Prototyping
Late Policy
- The penalty for being late is 10% for each late day.
- Submissions will be accepted until three days after the deadline. After that, it will be an automatic 0.
- Failure to submit will result in an automatic 0.
Intro
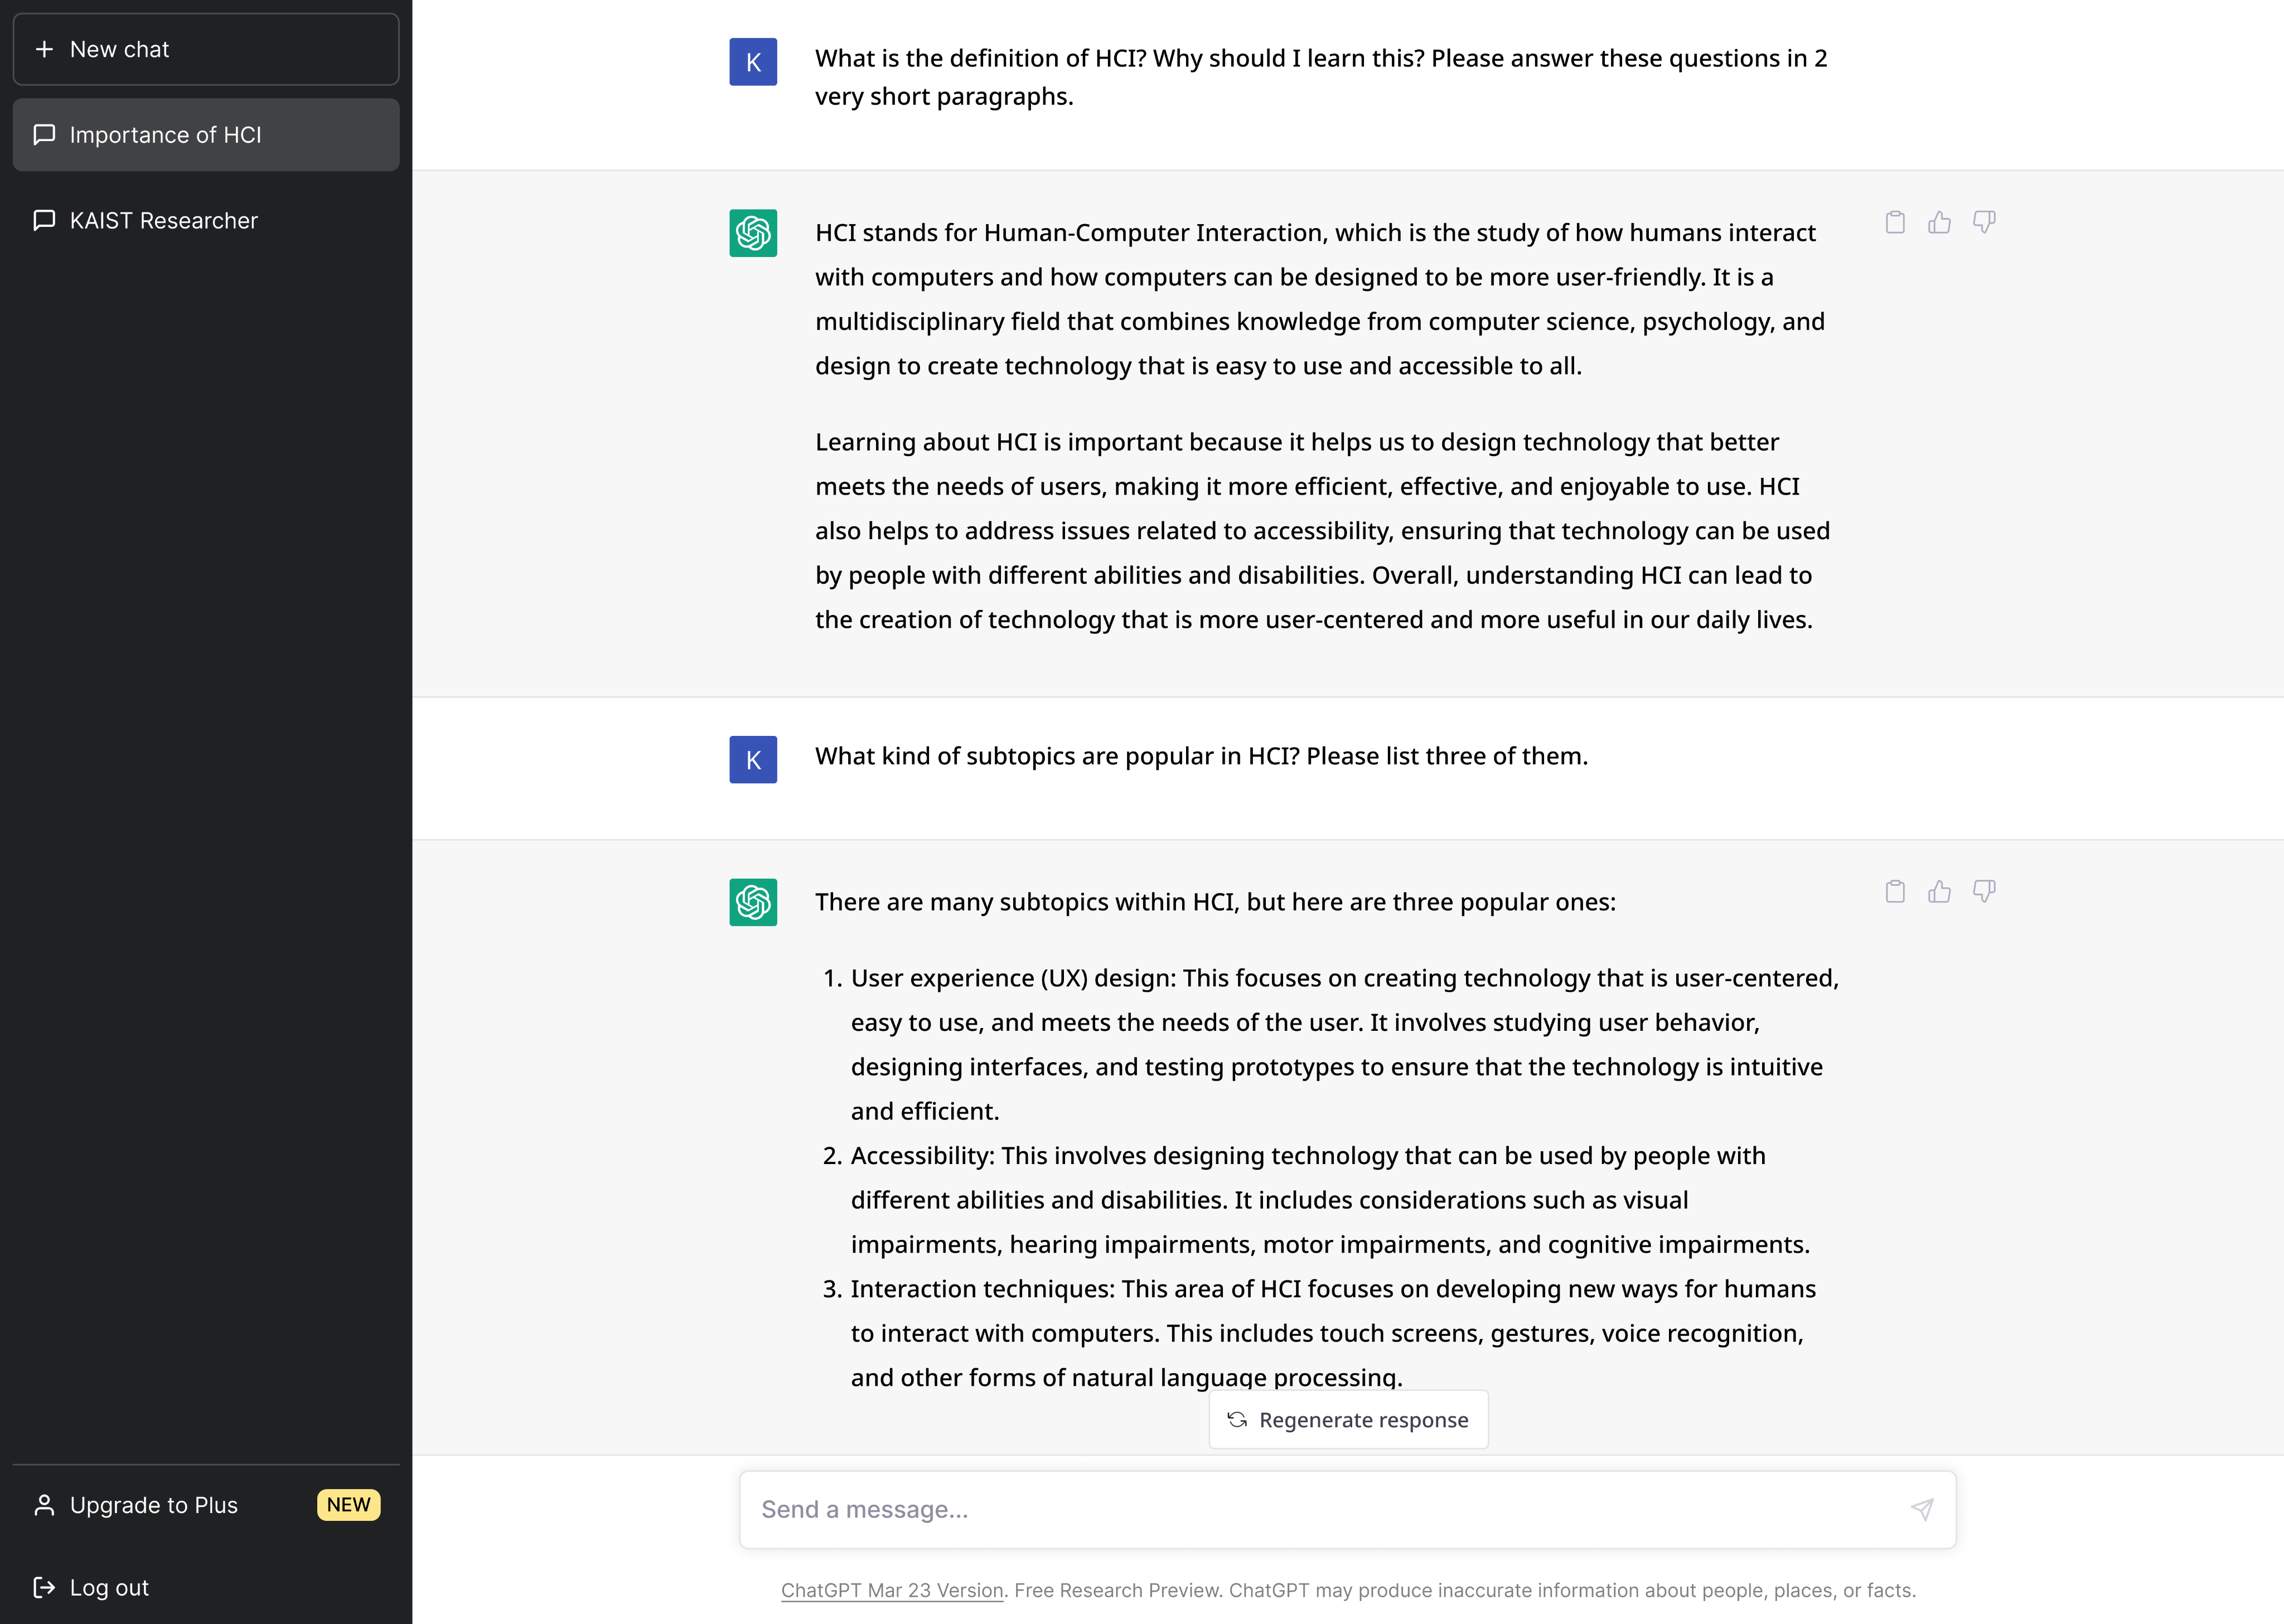
We created a ChatGPT login interface using Figma in our tutorial session. In this assignment, let’s make a prototype of the conversation interface of ChatGPT using Figma.
What should I do?
Your task is to build an interactive prototype to show the conversation feature of ChatGPT(https://chat.openai.com/). You’ll prototype two turns of conversation between the user and ChatGPT, and the chat thread (which is shown on the left of the interface).
Where do I start from?
We provide you with the starter kit, template Figma file. It includes
- A frame that can be used as a starting point
- Icons needed for the tasks
- Reference images for each step Make a copy of the template using “Duplicate to your drafts”, and change the title of your design file to “(student id)_(name)”
How do I submit?
- Make a shareable link to your Figma design file. Click the “Share” button and check whether the sharing permission is set to “Anyone with the link” - “can edit”. Only the course staff will review your assignment through this link.
- Copy the shareable link via the “Copy link” button, and submit it to this Google Form by the due date stated above.
- We track the version history of your Figma file. Any edits made after the deadline will be considered a late submission.
Where do I ask questions?
- If you have questions about this assignment, please post questions on Campuswire with the “Q&A - Assignment” category. TA will answer within a day. Your classmates could answer as well.
- If you believe your question should be kept private, please send an email to cs374kaist@googlegroups.com. After answering those questions, TA may share the question with other students.
Assignment details
This assignment includes three steps, which in total sum up to 120 points. Please carefully read the instructions and follow them step-by-step.
STEP 1: Draw a page of chats (60 pts)
In this step, you have to create two components for conversation, each for the user and ChatGPT. Then, using the components, you should complete the prototype of a screen containing 2 turns of chat.
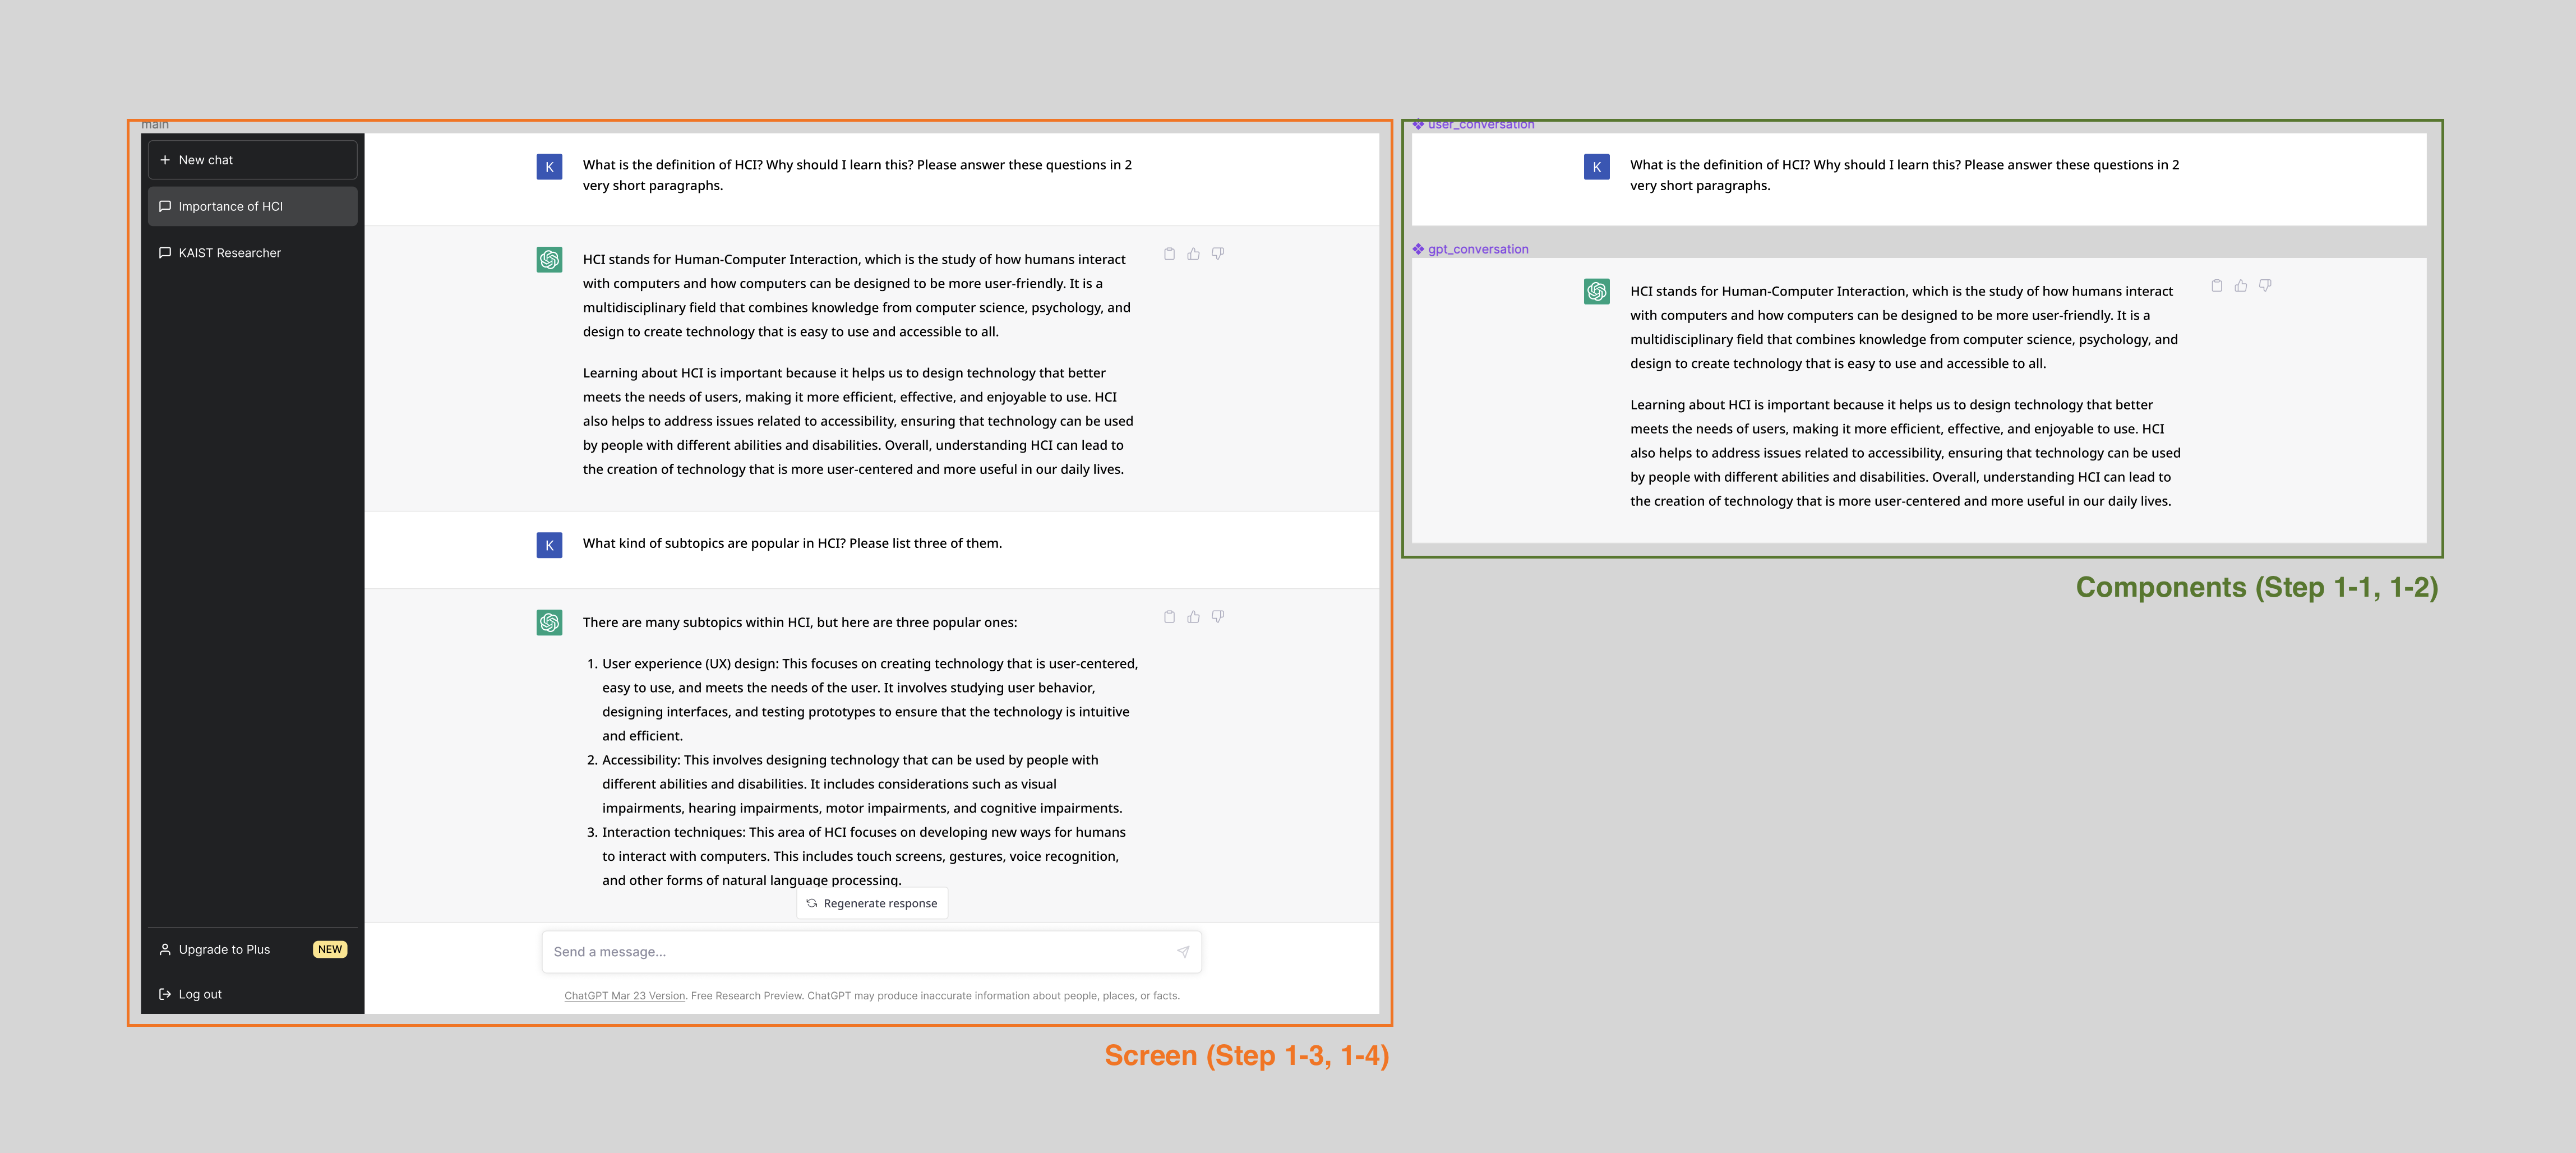
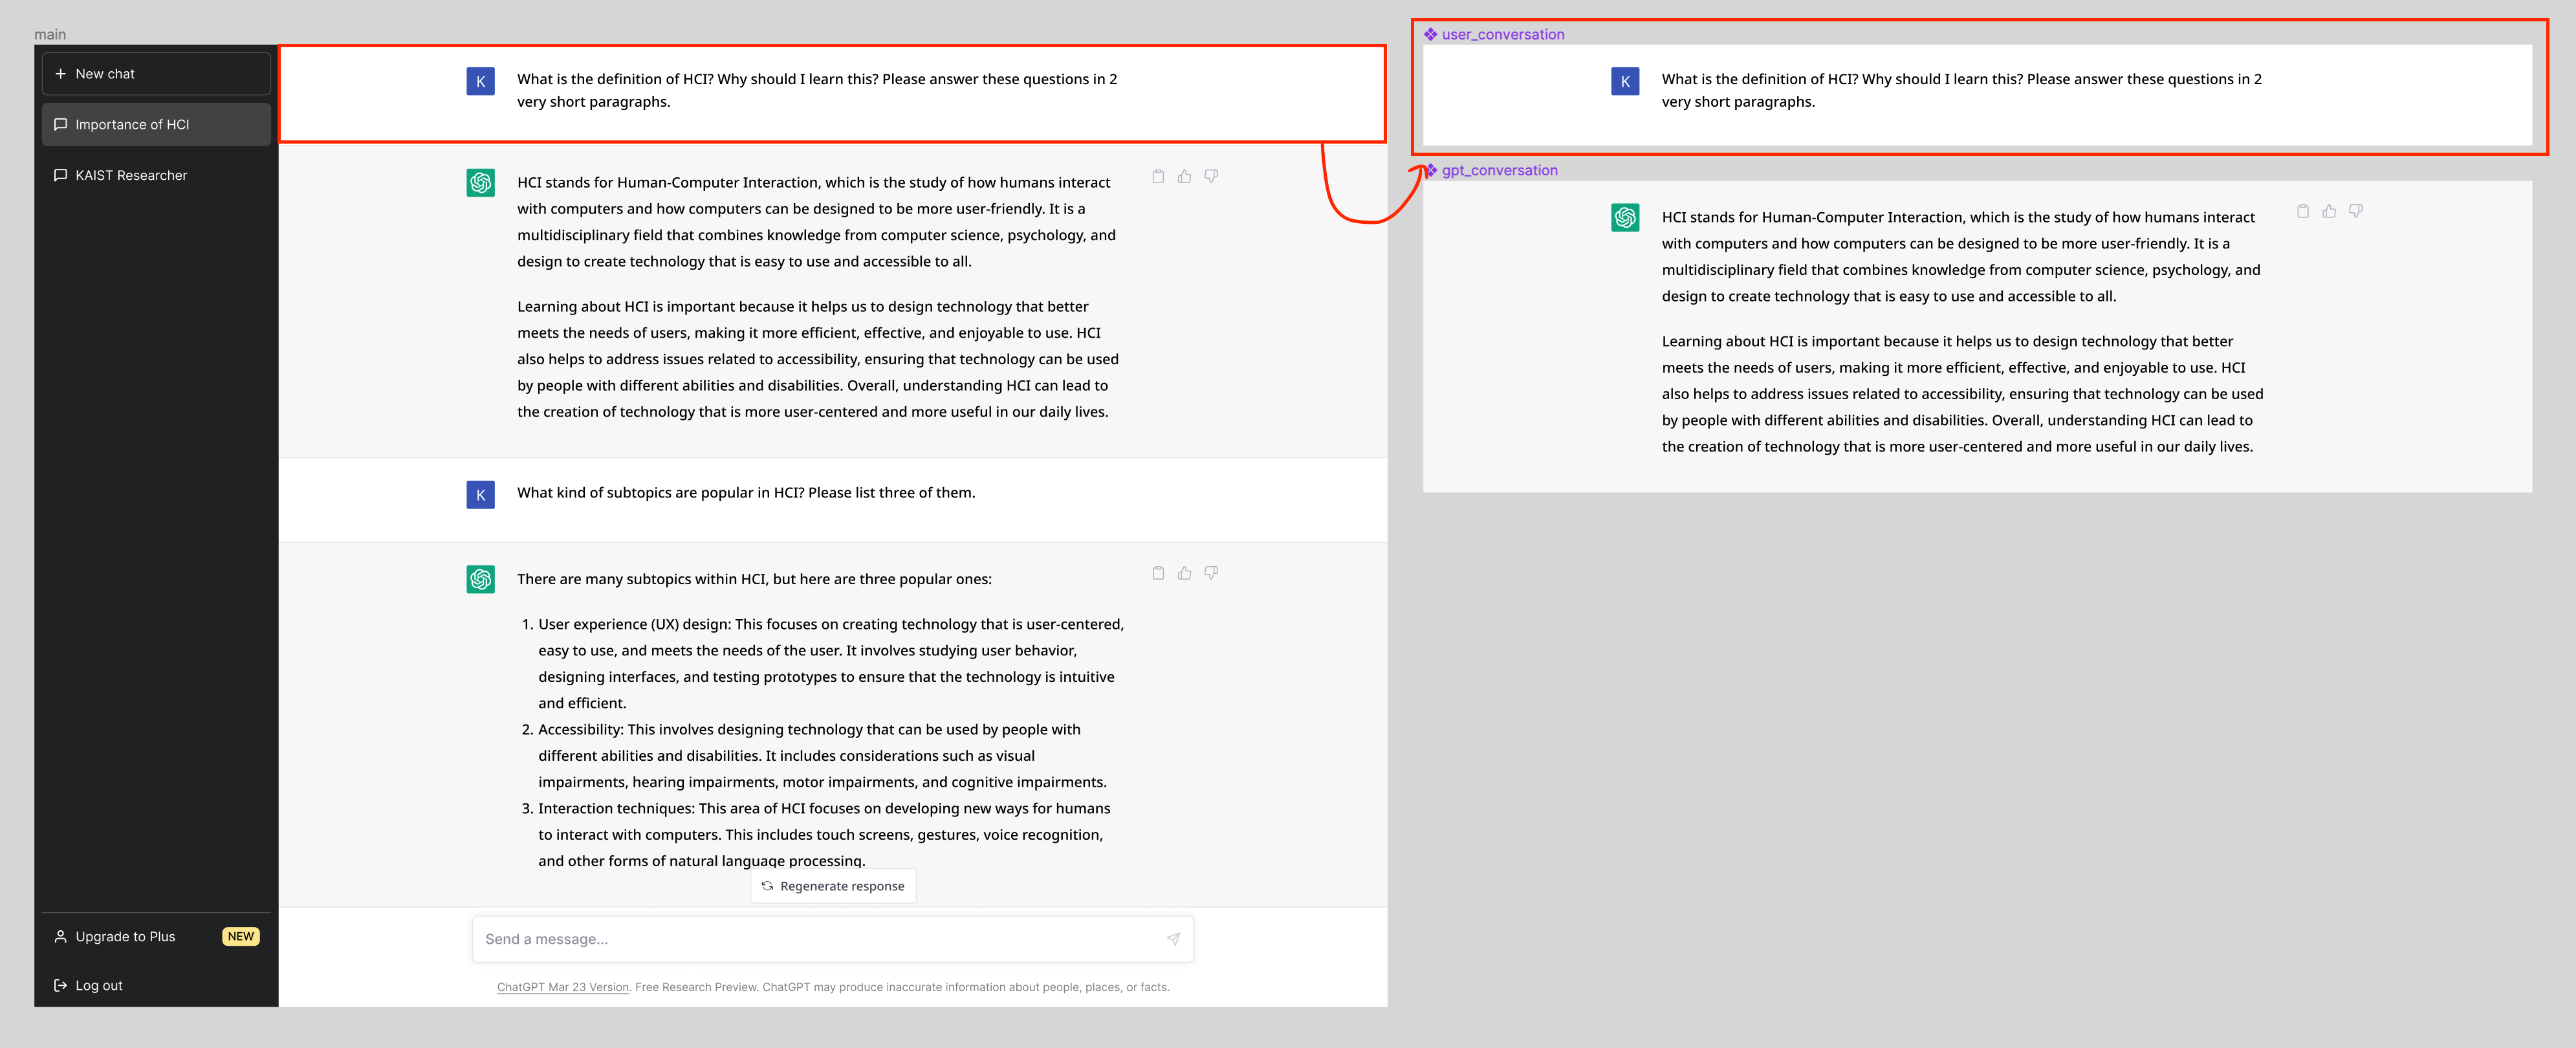
Step 1-1: User conversation component (20pt)
Let’s create a user conversation component based on the part of the reference image that corresponds to the user’s first utterance.
(5pts) Add background
- Add a rectangle of the same size as the reference.
- Add strokes only to the bottom.
- Change the color of the fill and stroke to match the reference.
(5pt) Make a user icon
- Use rectangle and text (“K”)
- Rectangle size: 30*30
- Radius of rectangle: 2
- Other attributes can be freely modified to resemble the reference image.
- Group the rectangle and the text.
- Move the icon to the proper position.
- 24px from the top
- 200px from the left
(5pts) Add text
- Add this text: “What is the definition of HCI? Why should I learn this? Please answer these questions in 2 very short paragraphs.”
- Font: Noto Sans, Medium
- Font size: 15
- Line height: 24
- Paragraph spacing: 20
- Width of the text box: 650
- Other attributes can be freely modified to resemble the reference image.
- Move the text to the proper position
- Align top with the icon
- 24px right from the icon
(5pts) Add auto layout
- Select background rectangle, icon, and text, and add auto layout.
- Set the padding as:
- left: 200 / right: 276 / top: 24 / bottom: 36
- Change the frame with the auto layout as a component.
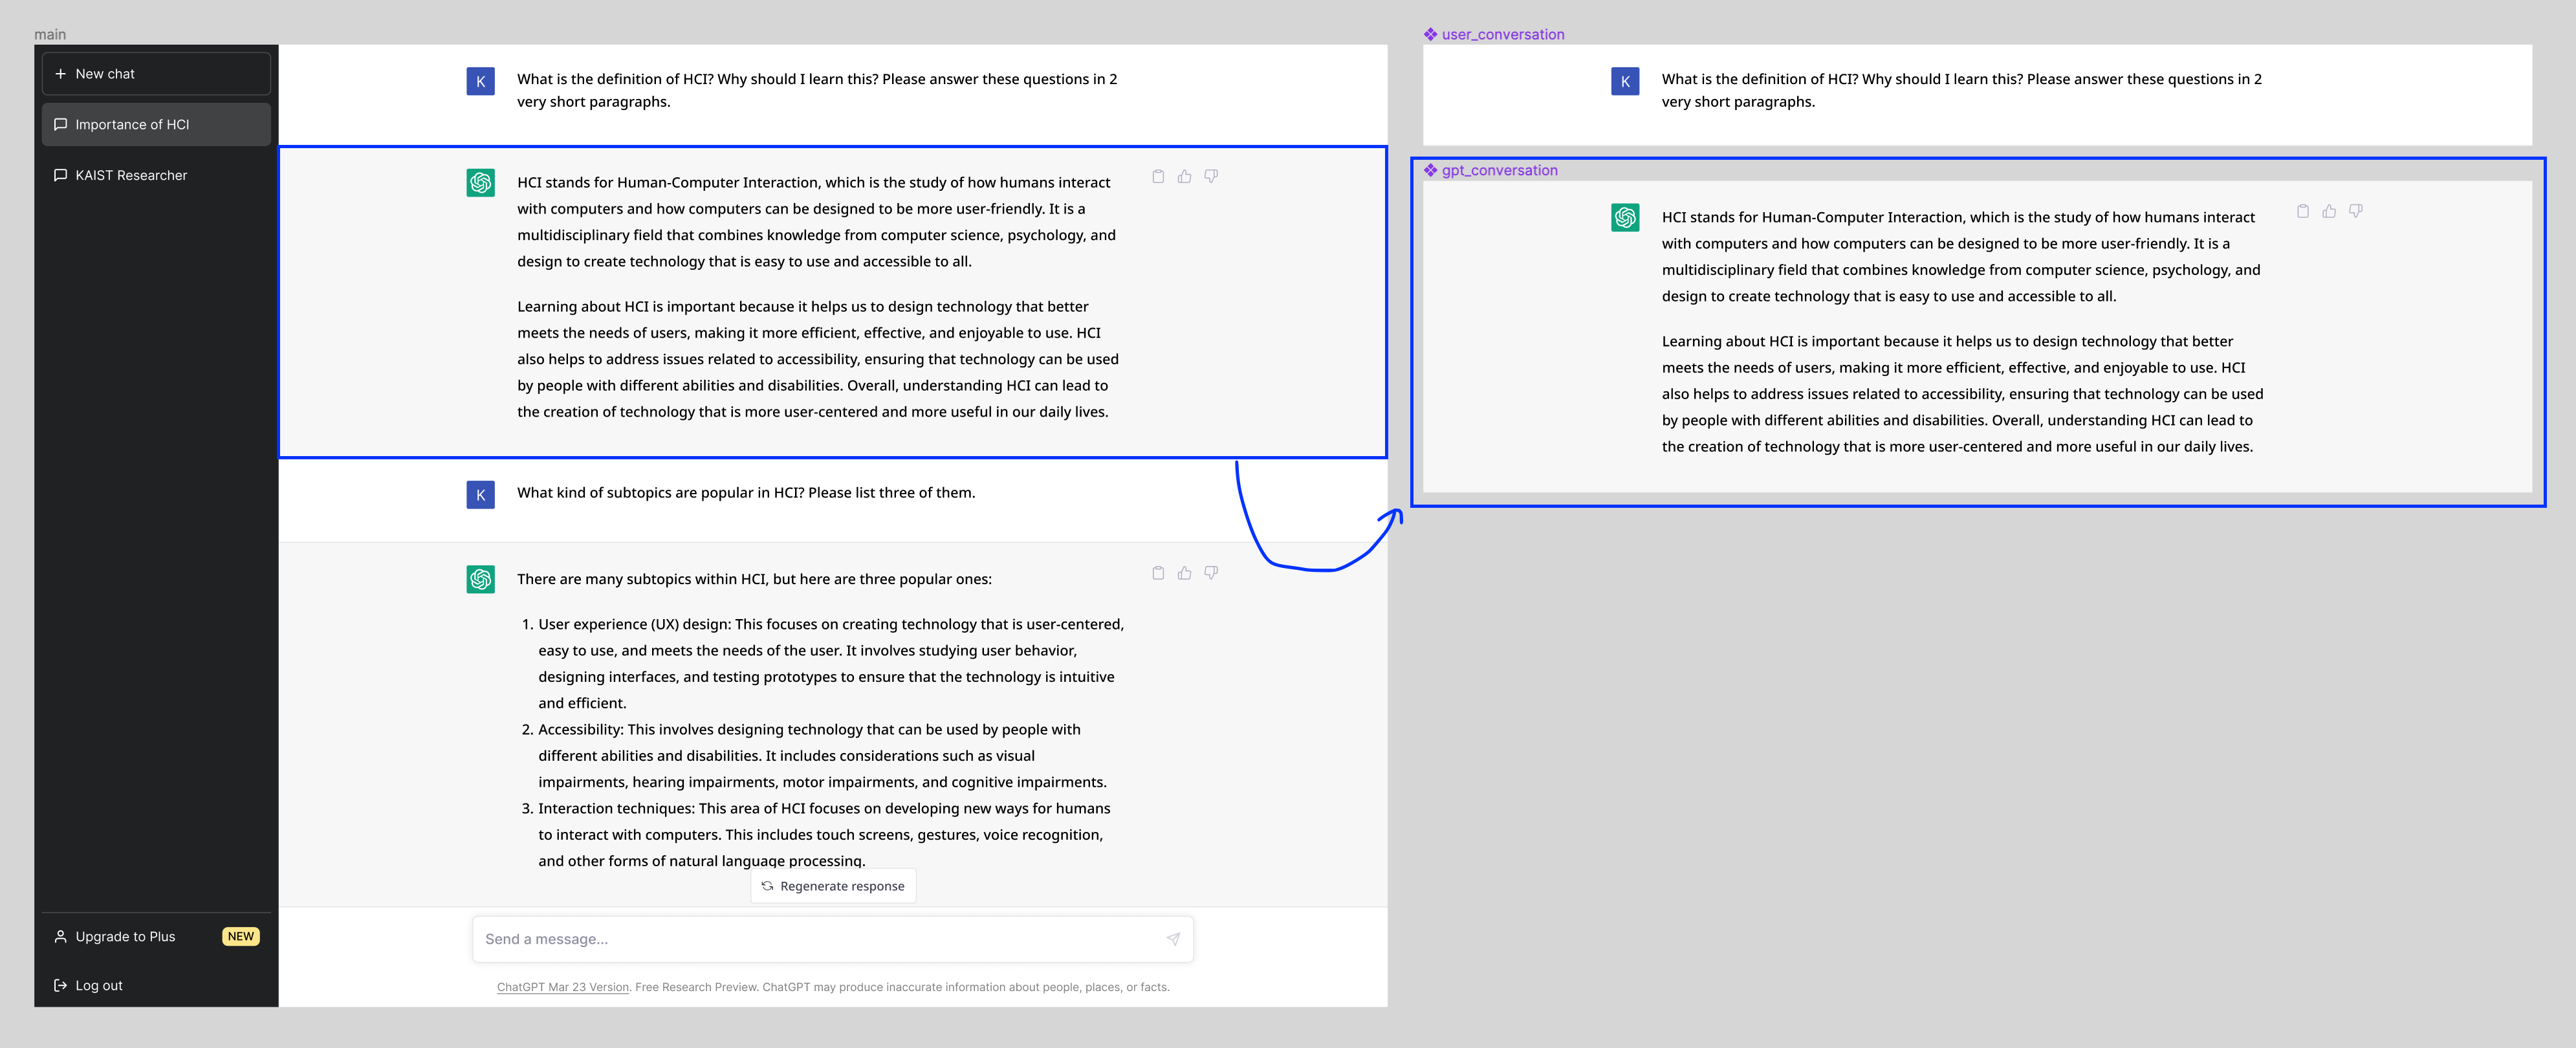
- Change the component name to “user_conversation”.
Step 1-2: ChatGPT conversation component (25pt)
Now, let’s create a ChatGPT conversation component based on the part of the reference image that corresponds to the ChatGPT’s first utterance.
(5pts) Add background
- Add a rectangle of the same size as the reference
- Add stroke only to the bottom
- Change the color of the fill and stroke to match the reference
(5pt) Make a user icon
- Use a rectangle and the given OpenAI icon
- Rectangle size: 30*30
- Radius of rectangle: 2
- Other attributes can be freely changed to resemble the reference image.
- Group rectangle and icon
- Move the icon to the proper position
- 24px from the top
- 200px from the left
(5pts) Add text
- Add this text:
HCI stands for Human-Computer Interaction, which is the study of how humans interact with computers and how computers can be designed to be more user-friendly. It is a multidisciplinary field that combines knowledge from computer science, psychology, and design to create technology that is easy to use and accessible to all. Learning about HCI is important because it helps us to design technology that better meets the needs of users, making it more efficient, effective, and enjoyable to use. HCI also helps to address issues related to accessibility, ensuring that technology can be used by people with different abilities and disabilities. Overall, understanding HCI can lead to the creation of technology that is more user-centered and more useful in our daily lives.
- Font: Noto Sans, Medium
- Font size: 15
- Line height: 28
- Paragraph spacing: 20
- Other attributes can be freely modified to resemble the reference image.
- Move the text to the proper position
- Align top with the icon
- 24px right from the icon
(5pts) Add icon group
- Get three icons (paste, upvote, downvote) from the template
- Align them in a line, with 12px spacing between
- Select all three icons, and make auto layout of them
- Move the icon group to the proper position
- Align top with the icon and text
- 24px from the text
(5pts) Add auto layout
- Select background rectangle, icon, text, and icon group, and add auto layout
- Set the padding as:
- left: 200 / right: 180 / top: 24 / bottom: 36
- Change the frame with the auto layout as a component
- Change the component name to “gpt_conversation”
Step 1-3: Complete a screen using components (10pt)
Using the two components that you made, complete the screen with 2 turns of conversation.
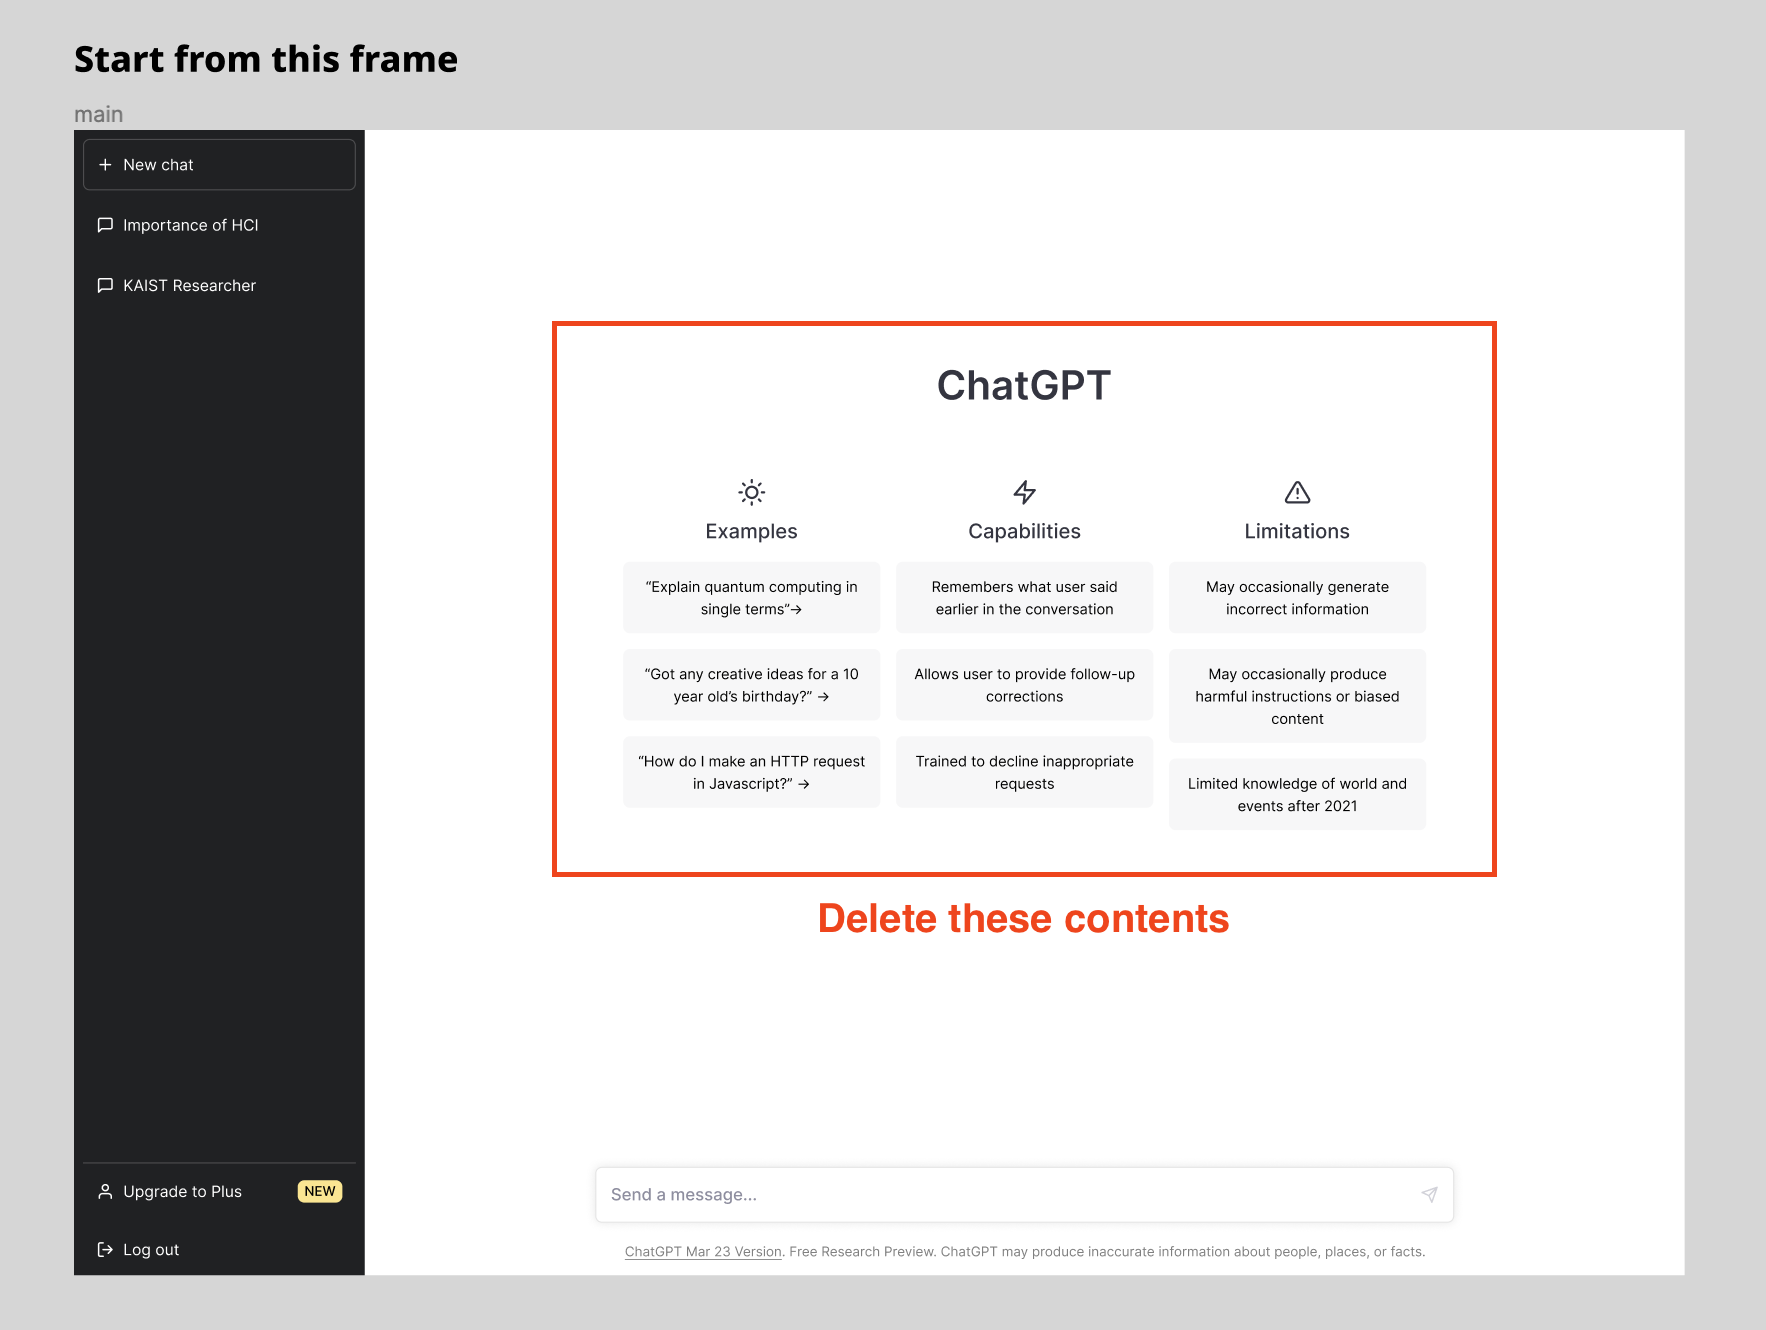
- Delete unnecessary contents (Title, message examples) from the given frame (“main”).
- Make two copies of the “userconversation” component and two copies of the “gptconversation” component
- Move them into the “main” frame, list them down in proper order, then add an auto layout.
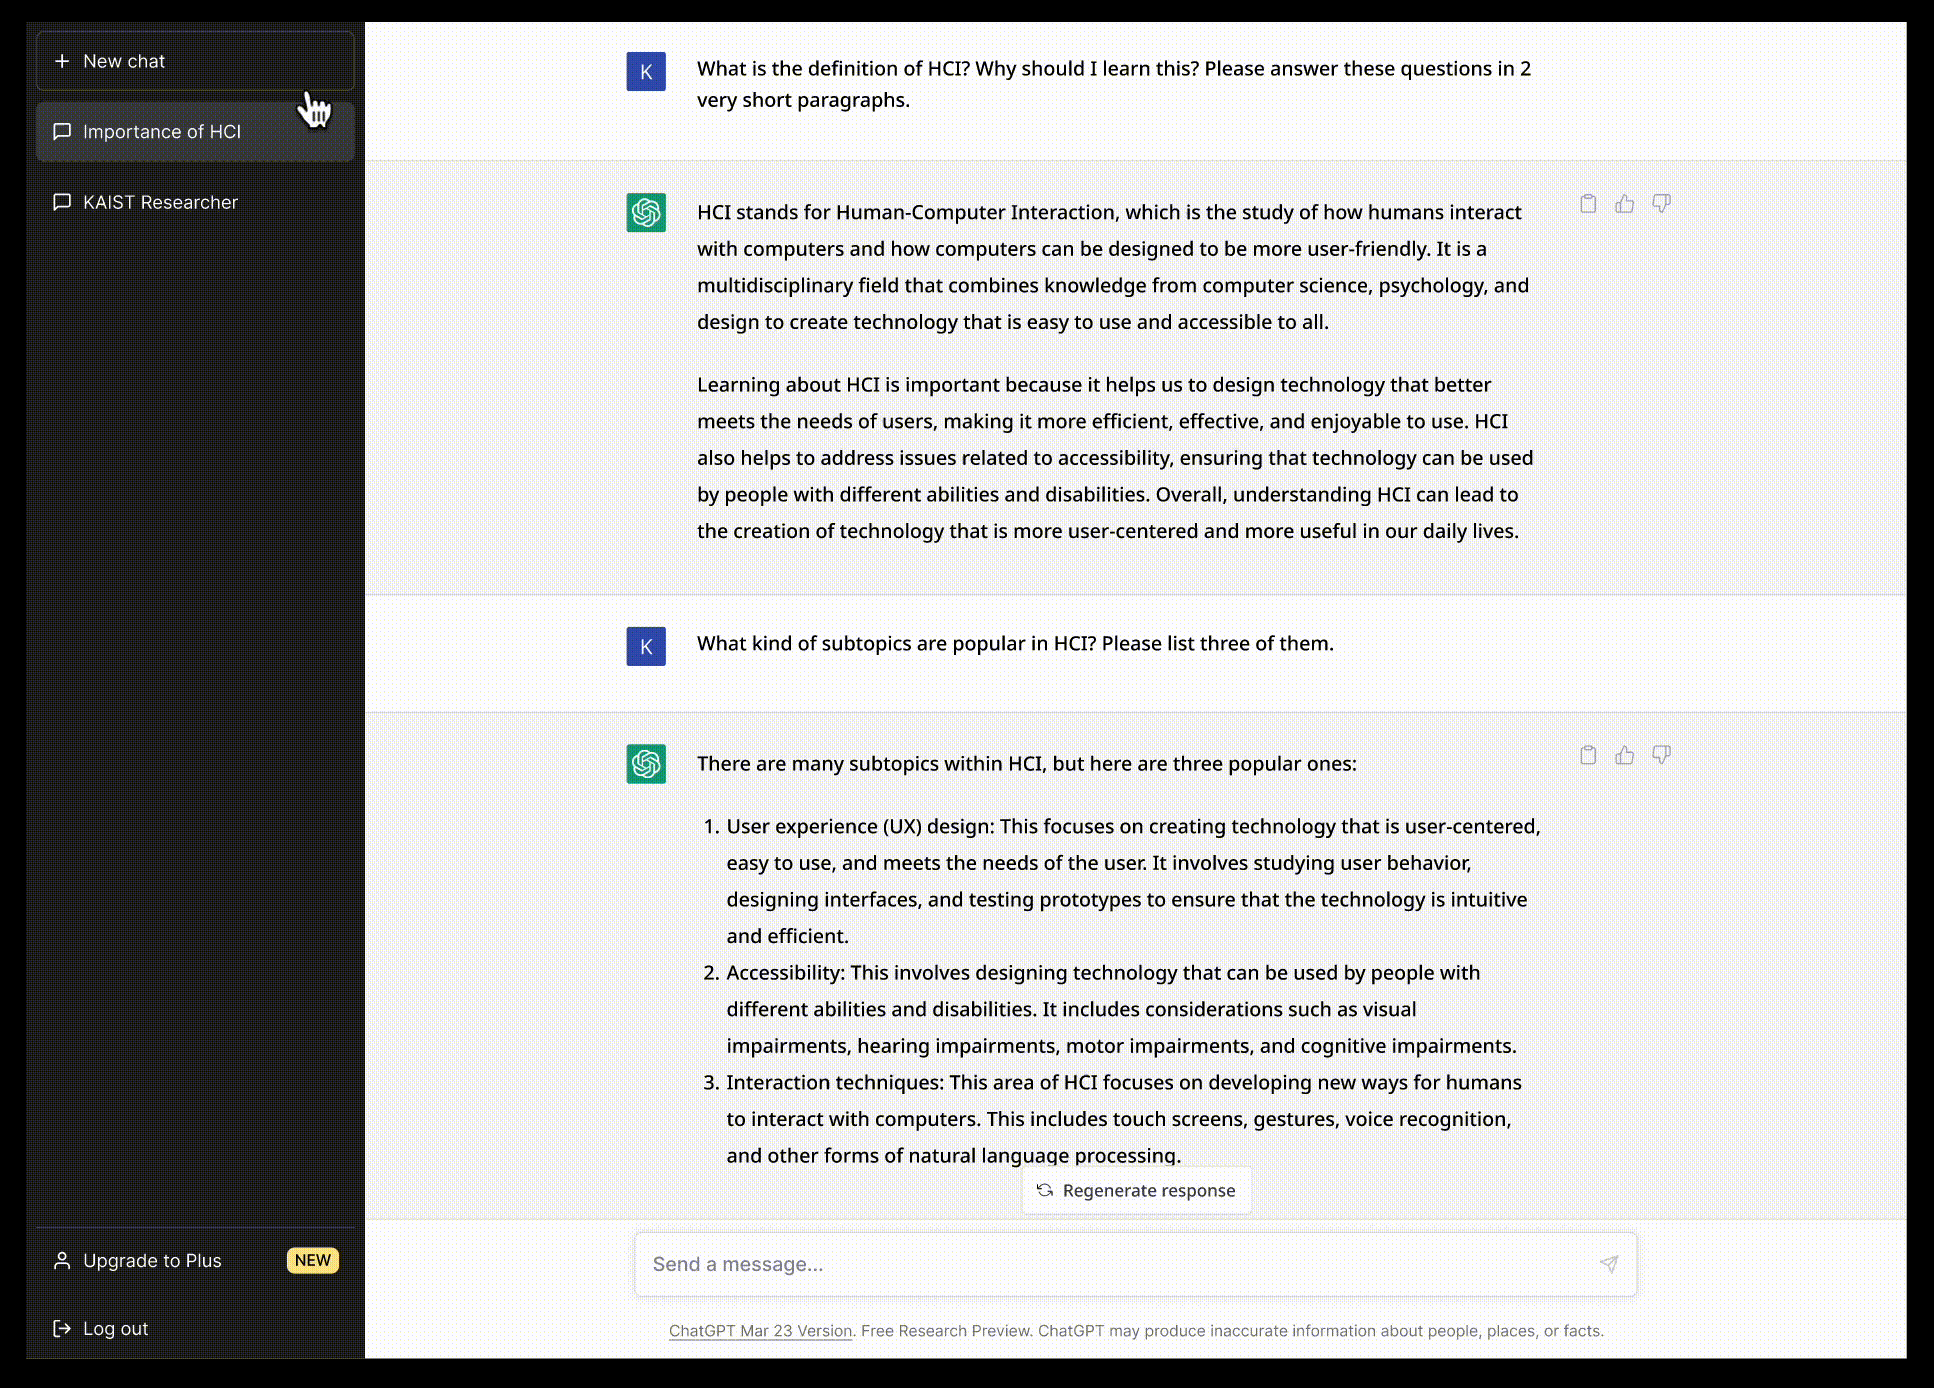
- For the second turn conversation, use the following chat:
User: What kind of subtopics are popular in HCI? Please list three of them. ChatGPT: There are many subtopics within HCI, but here are three popular ones:
- User experience (UX) design: This focuses on creating technology that is user-centered, easy to use, and meets the needs of the user. It involves studying user behavior, designing interfaces, and testing prototypes to ensure that the technology is intuitive and efficient.
- Accessibility: This involves designing technology that can be used by people with different abilities and disabilities. It includes considerations such as visual impairments, hearing impairments, motor impairments, and cognitive impairments.
- Interaction techniques: This area of HCI focuses on developing new ways for humans to interact with computers. This includes touch screens, gestures, voice recognition, and other forms of natural language processing.
Step 1-4: Add the “Regenerate response” button (5pt)
- Add a rectangle of the same size as the reference
- Change the color of the fill and stroke to match the reference
- Get a regenerate icon from the template
- Add text “Regenerate response”
- Align the rectangle, icon, and text properly, and add an auto layout.
- Change auto layout attributes so that the icon and text can be aligned in the vertical centerline.
- Move the button to the proper position to match the reference
STEP 2: Implement a flow of chats (40 pts)
Let’s now decompose the chat interface into multiple frames, and create a flow to simulate a conversation between the user and ChatGPT. Detailed instructions are as follows:
Step 2-1: Separate the chat page into multiple frames (30pt)
(15pt) Prepare a set of frames (desktop size) for a single turn of conversation. A single turn of conversation needs 3 frames, consisting of
- (1) a page where the user typed in a message to the chatbox,
- (2) a page where the user sent the message,
- and (3) a page where the ChatGPT generated a response
- Name them main-n (e.g., main-1, main-2, main-3)
(15pt) Make another turn of conversation
- Following the same approach, create 3 more frames (desktop size) composing the second turn of conversation.
- Name them main-n (n = 4~6)
Step 2-2: Add flow between the pages (10pt)
- Connect the 6 frames into an interactive prototype of two turns of chats using the flow feature.
- In detail,
- (1) → (2): Switch to the second page when the user clicks the send icon (refer to this letter-like icon) on the user input component.
- (2) → (3): Switch to the third page when the user clicks the user conversation component.
- (3) → (1): Fill in user input when user clicks on the “Send a message…” text.
- Test your interaction by clicking on the Present button on the top right corner.
STEP 3: Make a new chat thread, and switch between threads (20 pts)
You have now successfully implemented two turns of conversation. Let’s add a interaction to make a new chat thread to the current prototype.
Step 3-1: Add a new thread frame (10pt)
(5pt) Create a new page frame (desktop size) consisting of a new thread. Name the frame “new thread”.
- On the left side of the frame, create a new chat thread button that says “New Thread”.
- On the right side of the frame, use the template frame provided to make a page that looks like the starting page. (5pt) Highlight the current thread by setting fill to white with 15% transparency to the thread rectangle on the left.
Step 3-2: Add flow between the pages (10pt)
(5pt) Connect the “main-6” frame with the “new thread” frame. After the user finishes two turns of conversation, they should be able to start a new thread.
(5pt) Connect the “new thread” frame with the “main-6” frame. The user should be able to see previous chat records by going back to the “main-6” frame.
- The user should be able to freely switch between the “main-6” and the “new thread” frames.
- Test your interaction by clicking on the “Present” button on the top right corner.